
How-To: Seamless Instagram Carousel for Horizontal Photos

If someone is scrolling on Instagram at 100mph, as per usual, you have a higher chance of catching their eye if your Instagram photo is vertical. This is because it takes up more surface area than a horizontal photo. I can probably take an educated guess and say that the majority of the photos you look at and take for Instagram are vertical, too.
Think about it. How often do you take horizontal photos for your Instagram? Probably not that often, right? Personally, I’ve entirely neglected to even consider posting horizontal photos on my Instagram for the sake of the detail being lost and having them overlooked.
But what if you have a stellar horizontal photo that you really want to post? How can you post it and show off every tiny detail to its fullest potential?
I have a solution for you, my friend.
Create a seamless carousel Instagram post for your horizontal photo.
This technique will bring a new light to your photo. It will effectively capture your follower’s attention, it will ensure that no detail is lost, and it will show your followers diversity in your photography and creativity.
Now, let’s open up Photoshop and get started!
Step 1
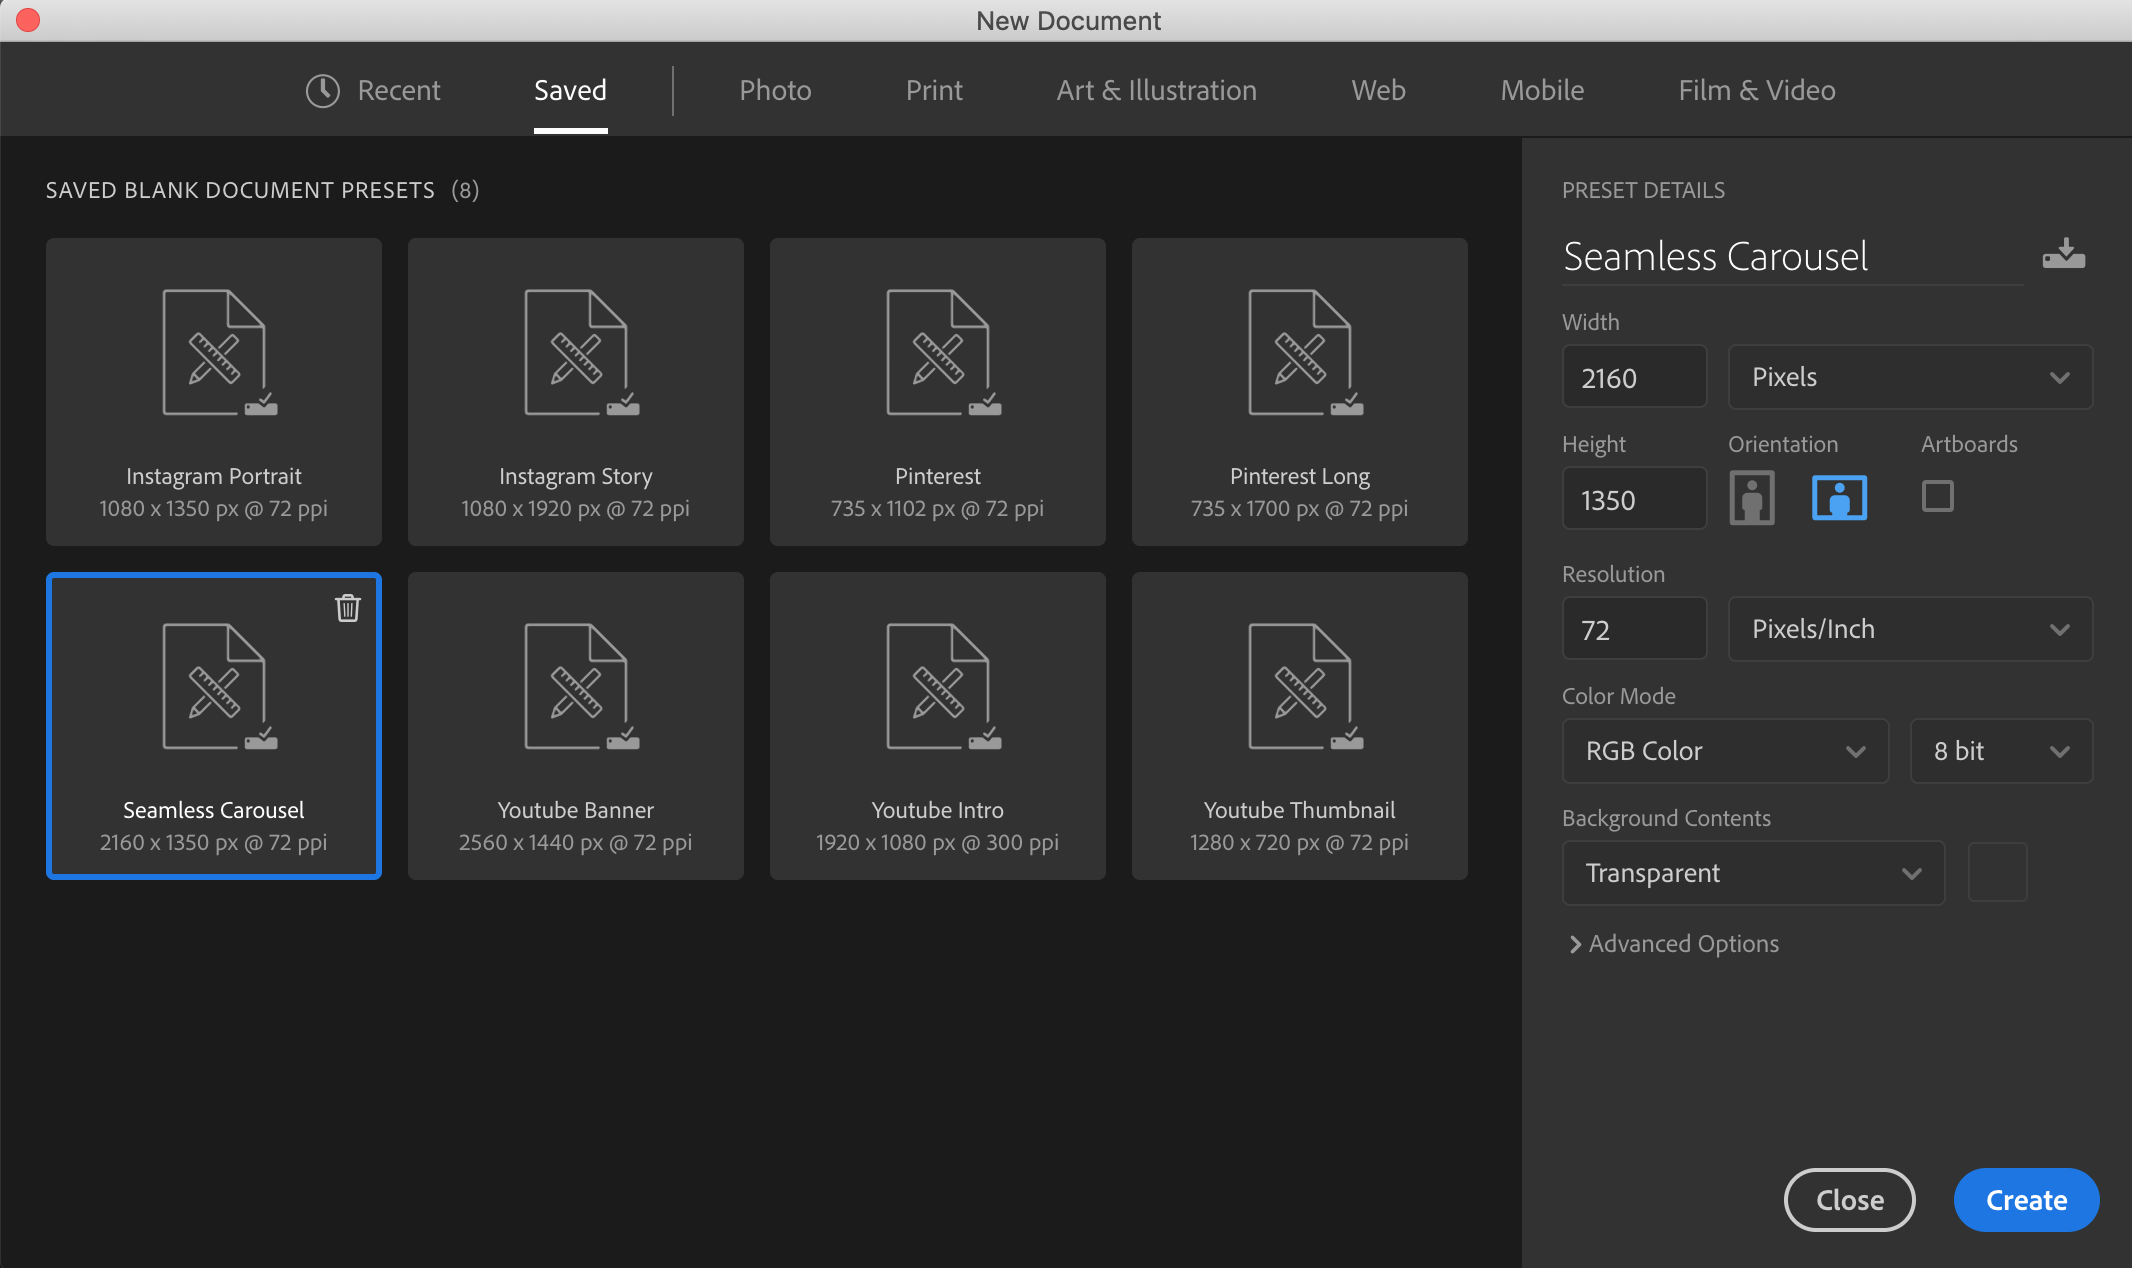
Open up a new document in Photoshop with the dimensions of 2160 x 1350 pixels.
FYI: The dimensions for the tallest portrait photo that Instagram allows is 1080 x 1350 pixels. For this carousel, we are doubling the width to essentially fit two portrait photos side by side.
Step 2
If your ruler isn’t already showing around your canvas, hit ⌘R.
Next, place your image on your blank canvas. (There are many ways to do this. I find that the quickest way is to just drag and drop your photo onto the blank canvas.)
Then, drag out the corners of the image until the entire canvas is filled with your photo and composed to your liking.
Hit ENTER on your keyboard.

Step 3
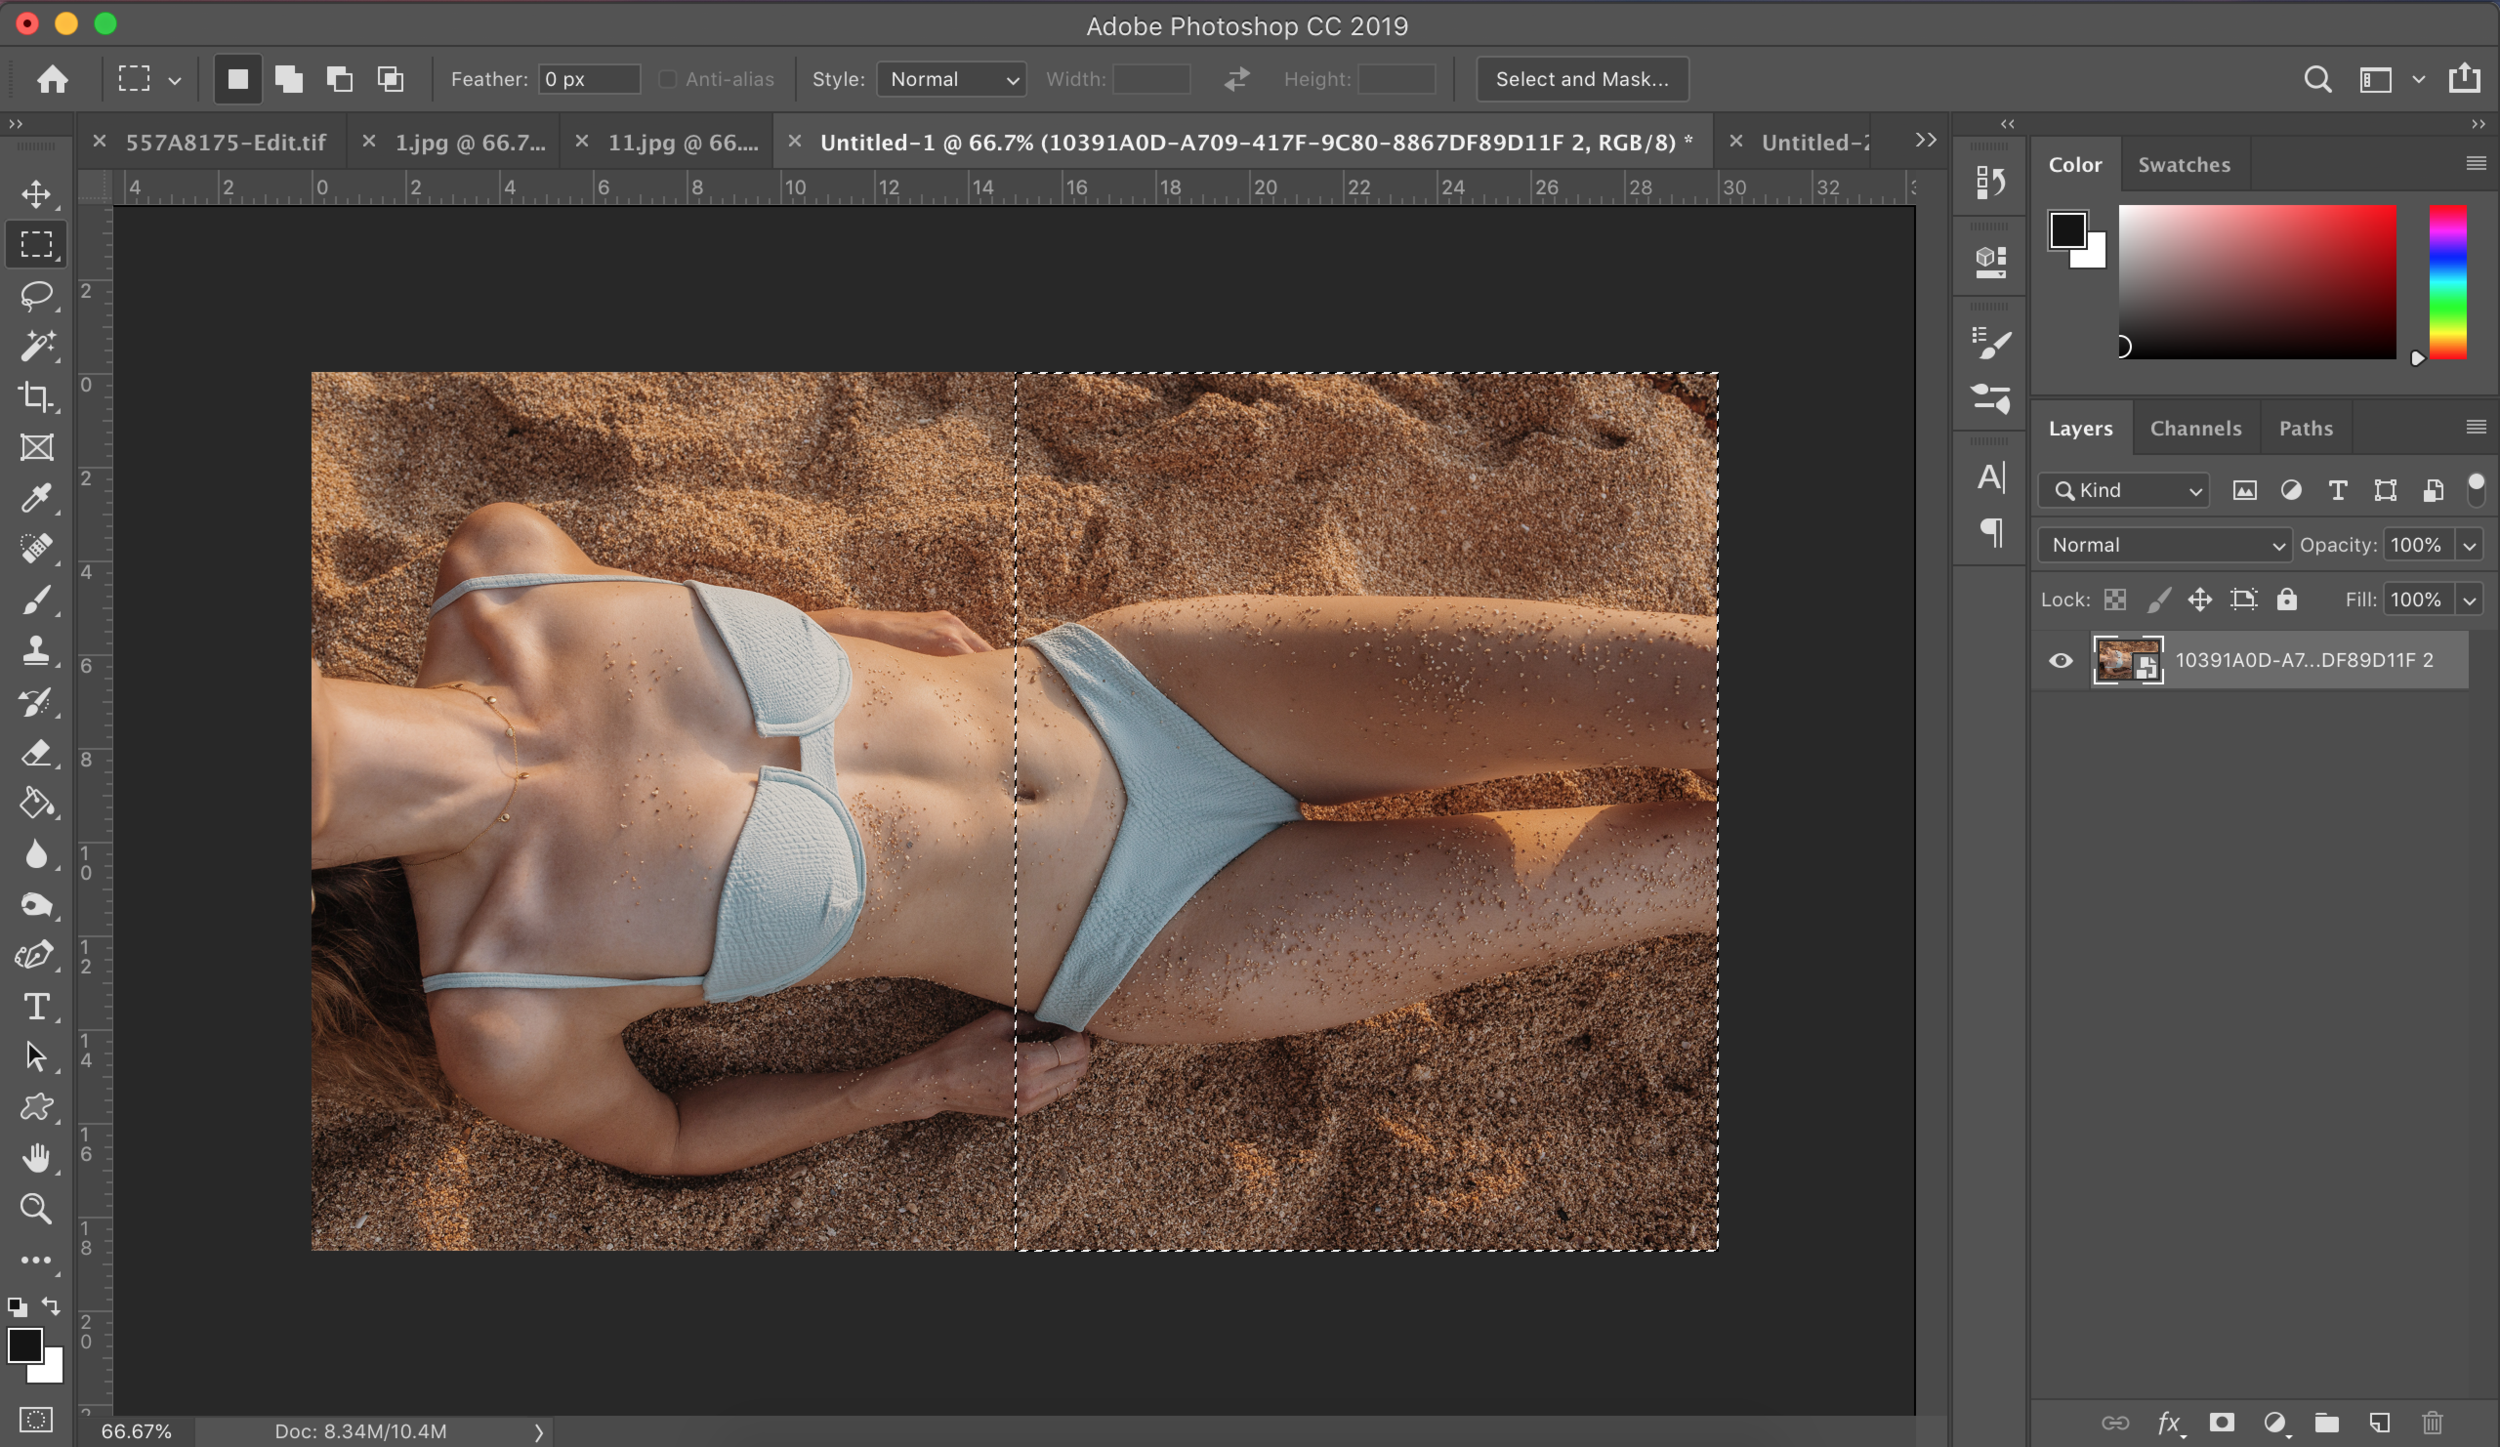
Click the Rectangular Marquee Tool (or M on your keyboard).
Click and drag from the top left corner down until you’ve reached the exact middle. You’ll know it’s in the middle when the black dimensions box says W: 15.000 in.

Step 4
Hit ⌘C, hit ⌘N, make sure Clipboard is selected, hit CREATE, then hit ⌘V.
Save this photo as a JPEG by going to File > Save As… or hit ⌘ Shift S.


Step 5
Go back to the original horizontal photo.
Click and drag the current selected area to the right side.
Then, repeat Step 4.
Step 6
Yay! How easy was that?
You now have two separate photos that are ready to be put into a seamless carousel on Instagram. Airdrop your photos to your phone and get posting :)
Use #haleytaughtme for a chance to be featured on my Instagram story!