

Create a Kaleidoscope Effect For Your Photos in Photoshop

I have been CAPTURED by all the images I've been seeing lately with this kaleidoscope effect. Now I'm sure you probably don't own a kaleidoscope..I may be wrong..but I just feel like that's just not a common household item anymore. Photoshop, on the other hand, totally is. And it's easily one of my favorite editing programs and one of my go-to's when I'm feeling a little funky and creative.
Today, I'm going to take you along with me in creating a kaleidoscope effect in Photoshop through a step-by-step tutorial.
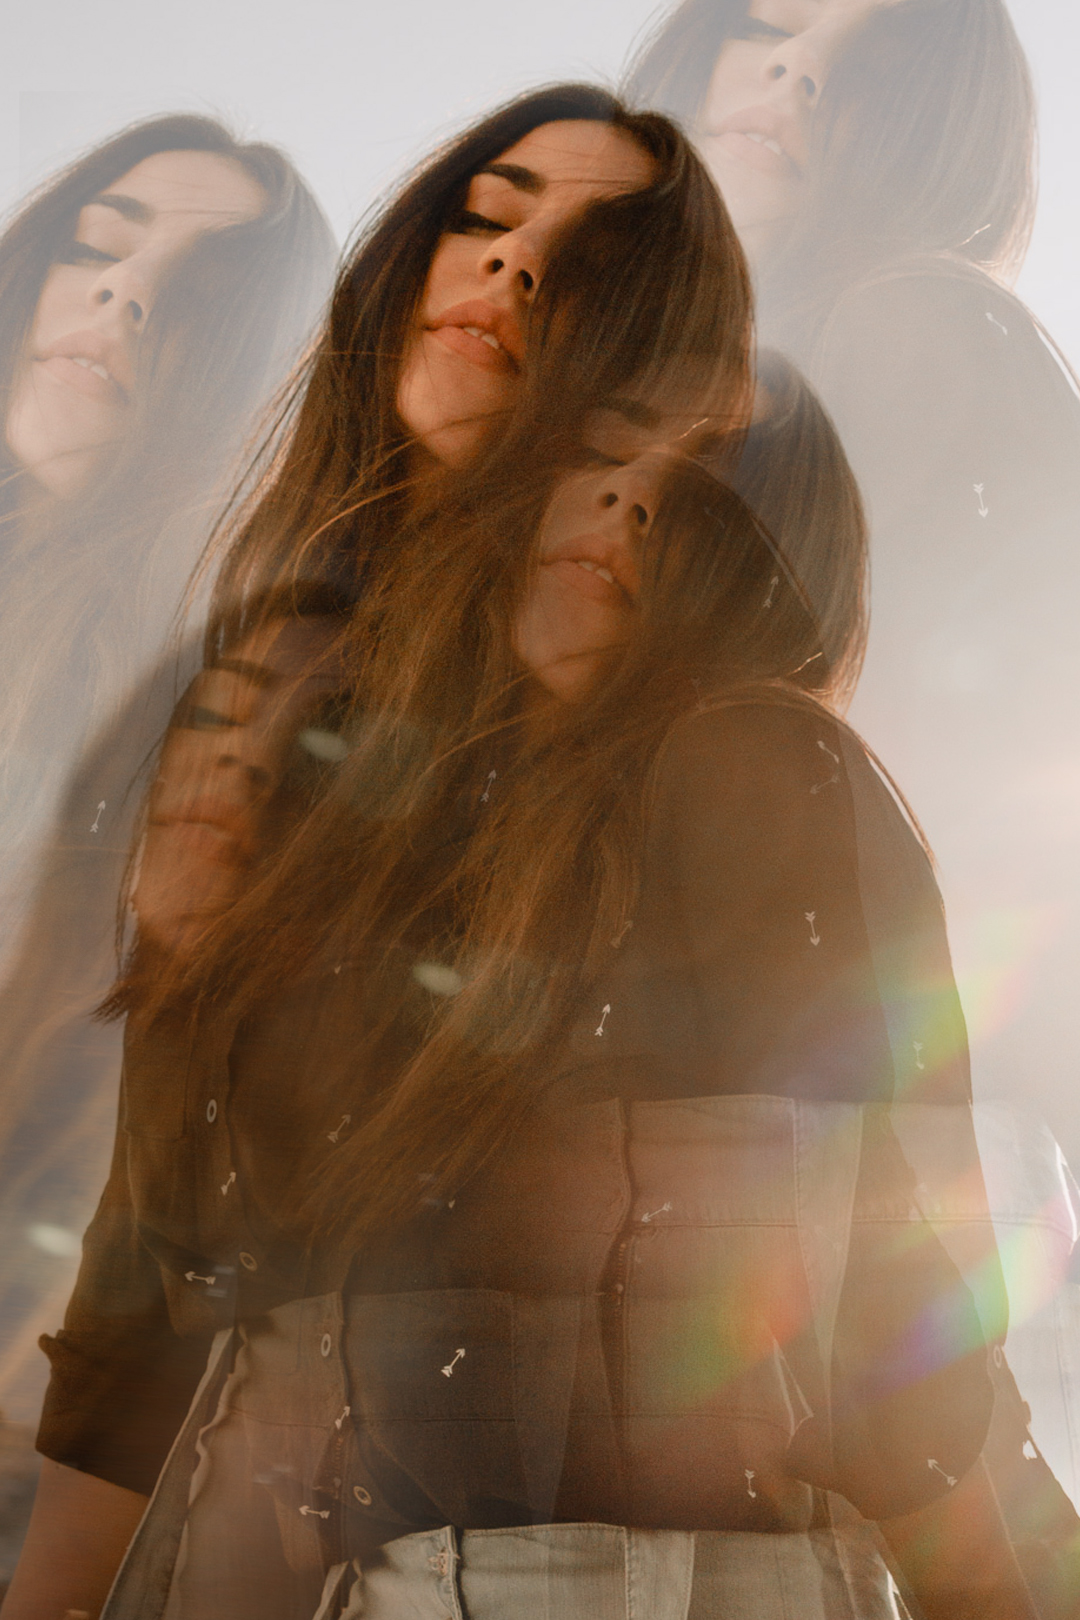
Photo I'm Using:

Photograph by Jade Hang / Model: Orion Carloto
The Steps:
1. Open up your high resolution photo or drag and drop the photo I'm using into Photoshop.
2. Go to Layer > Duplicate Layer > Ok.

3. Press "V" on your keyboard and drag the photo down to the right corner. Set your opacity to 80% (located right above your Layers!)
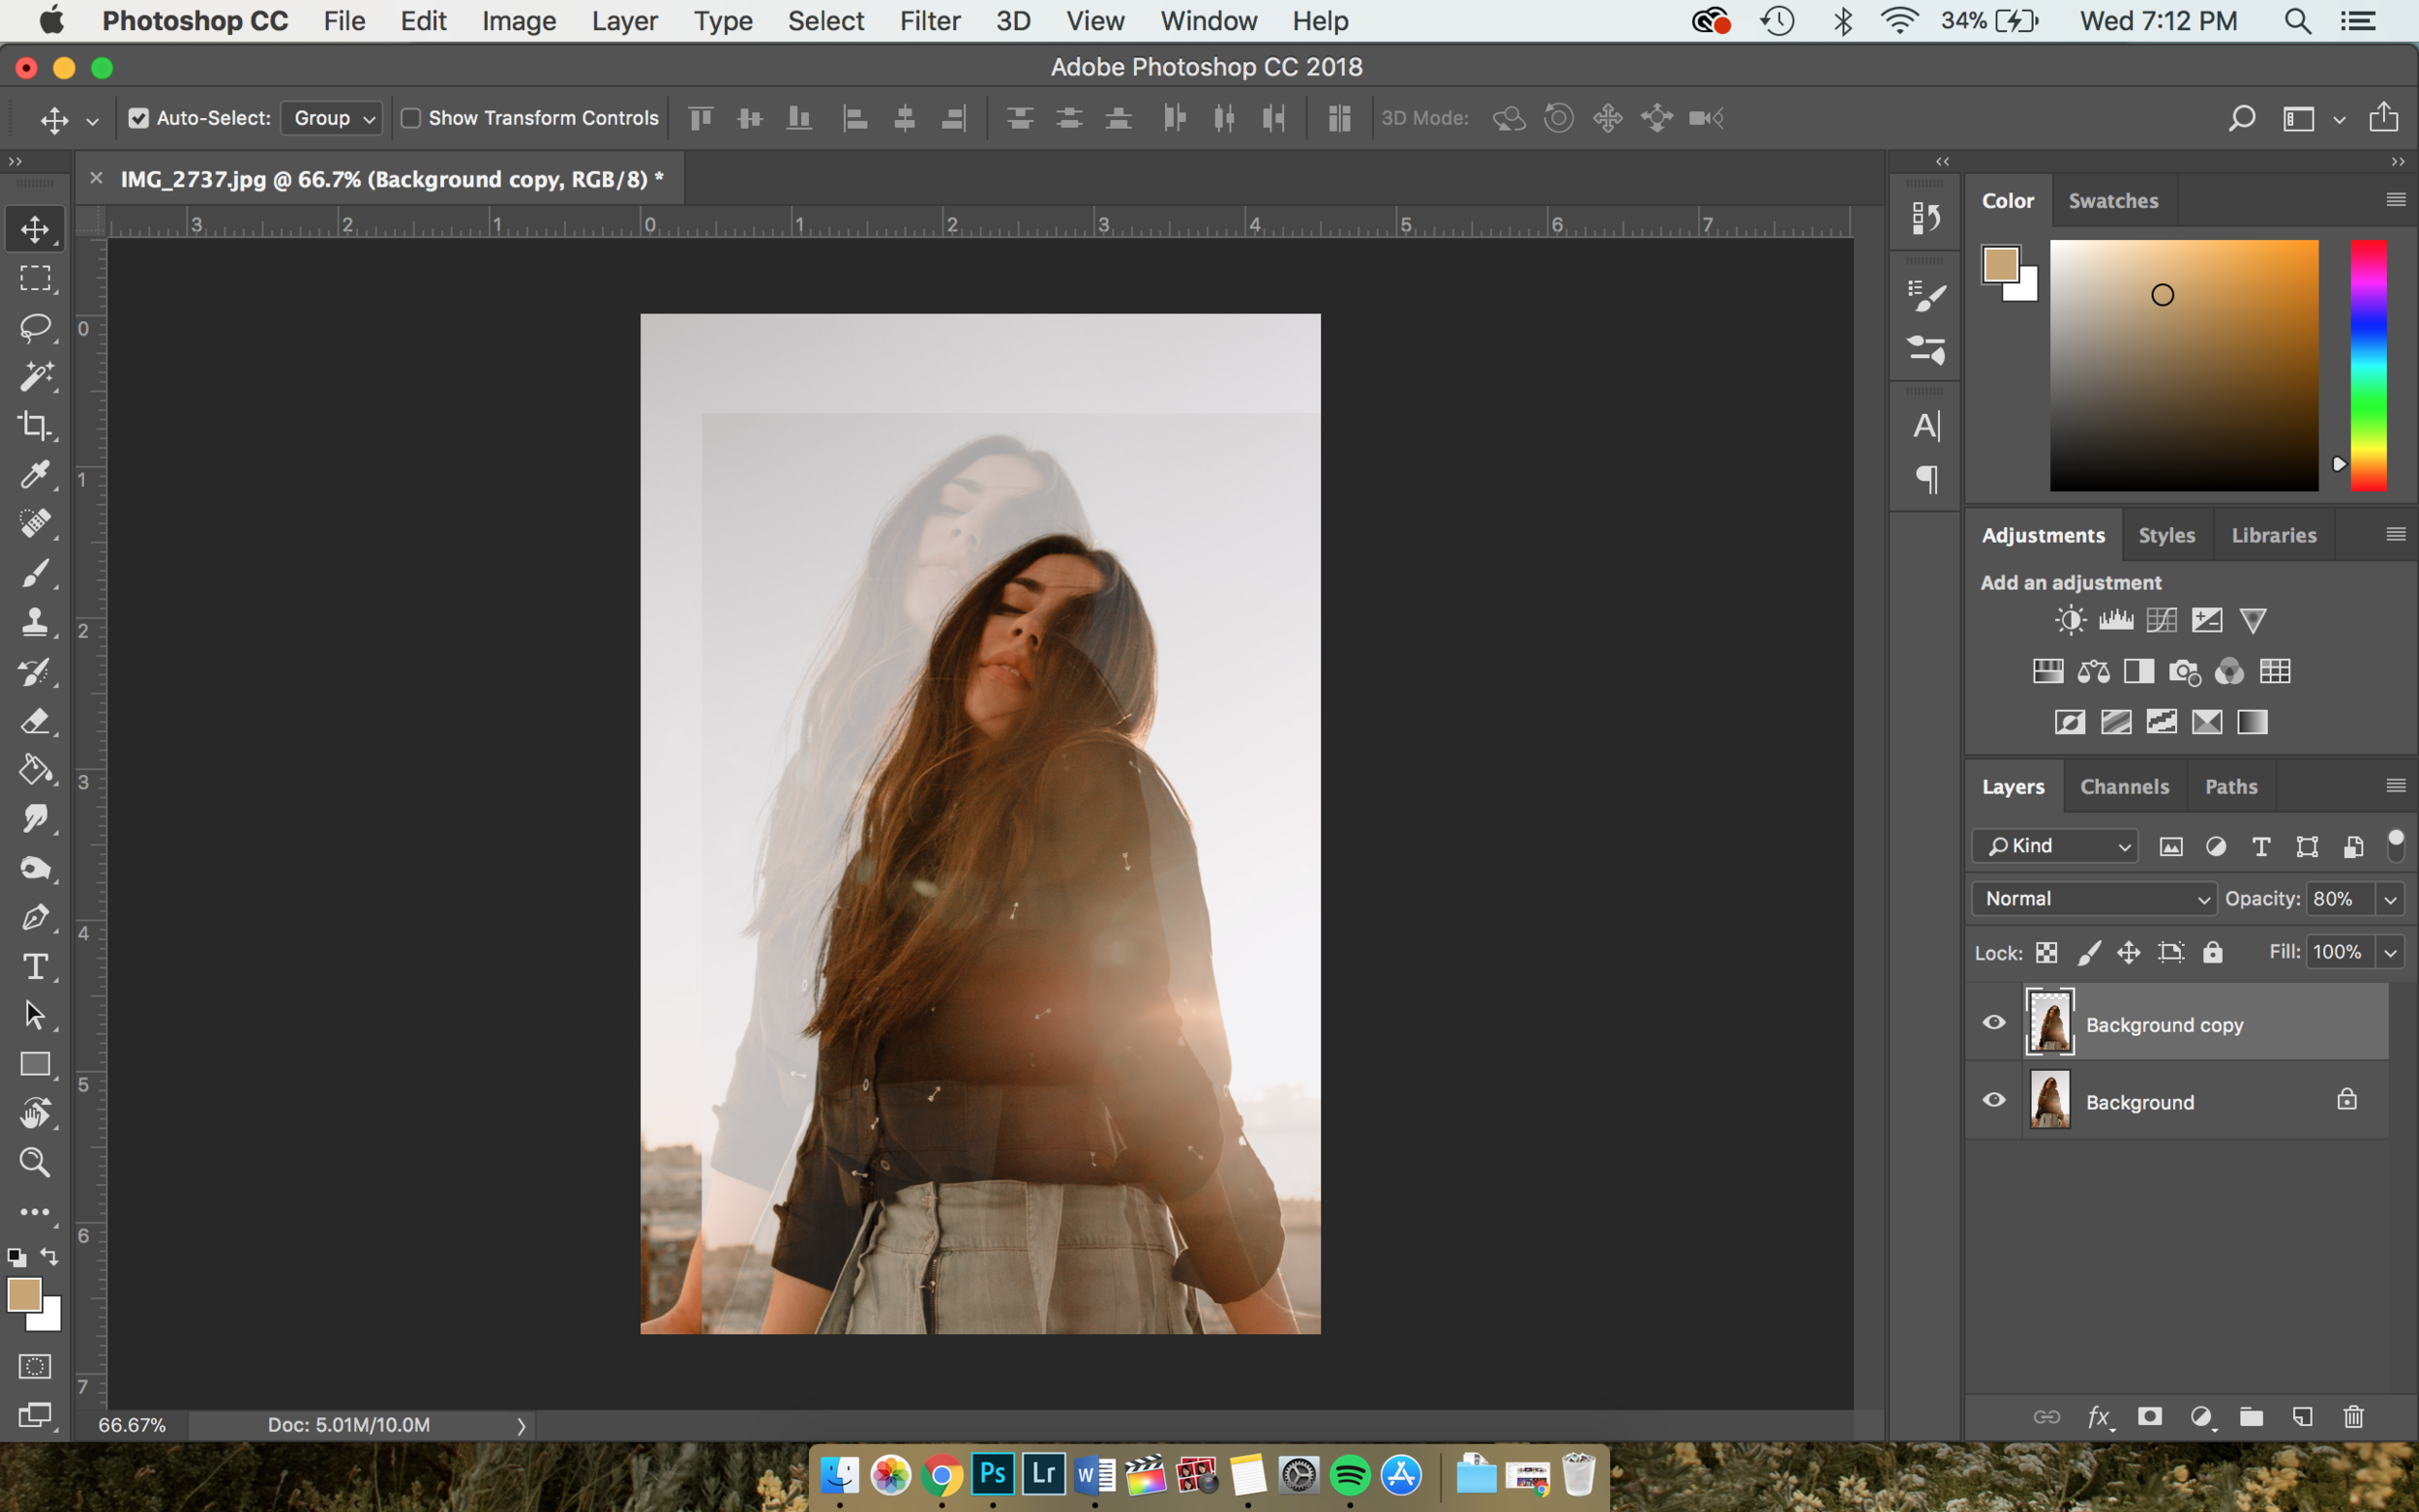
4. Press “E” on keyboard for the eraser, select Soft Round, and make the eraser size pretty big. Erase along the outer portion of the photo and don’t be afraid to go over the head and body a little bit too.


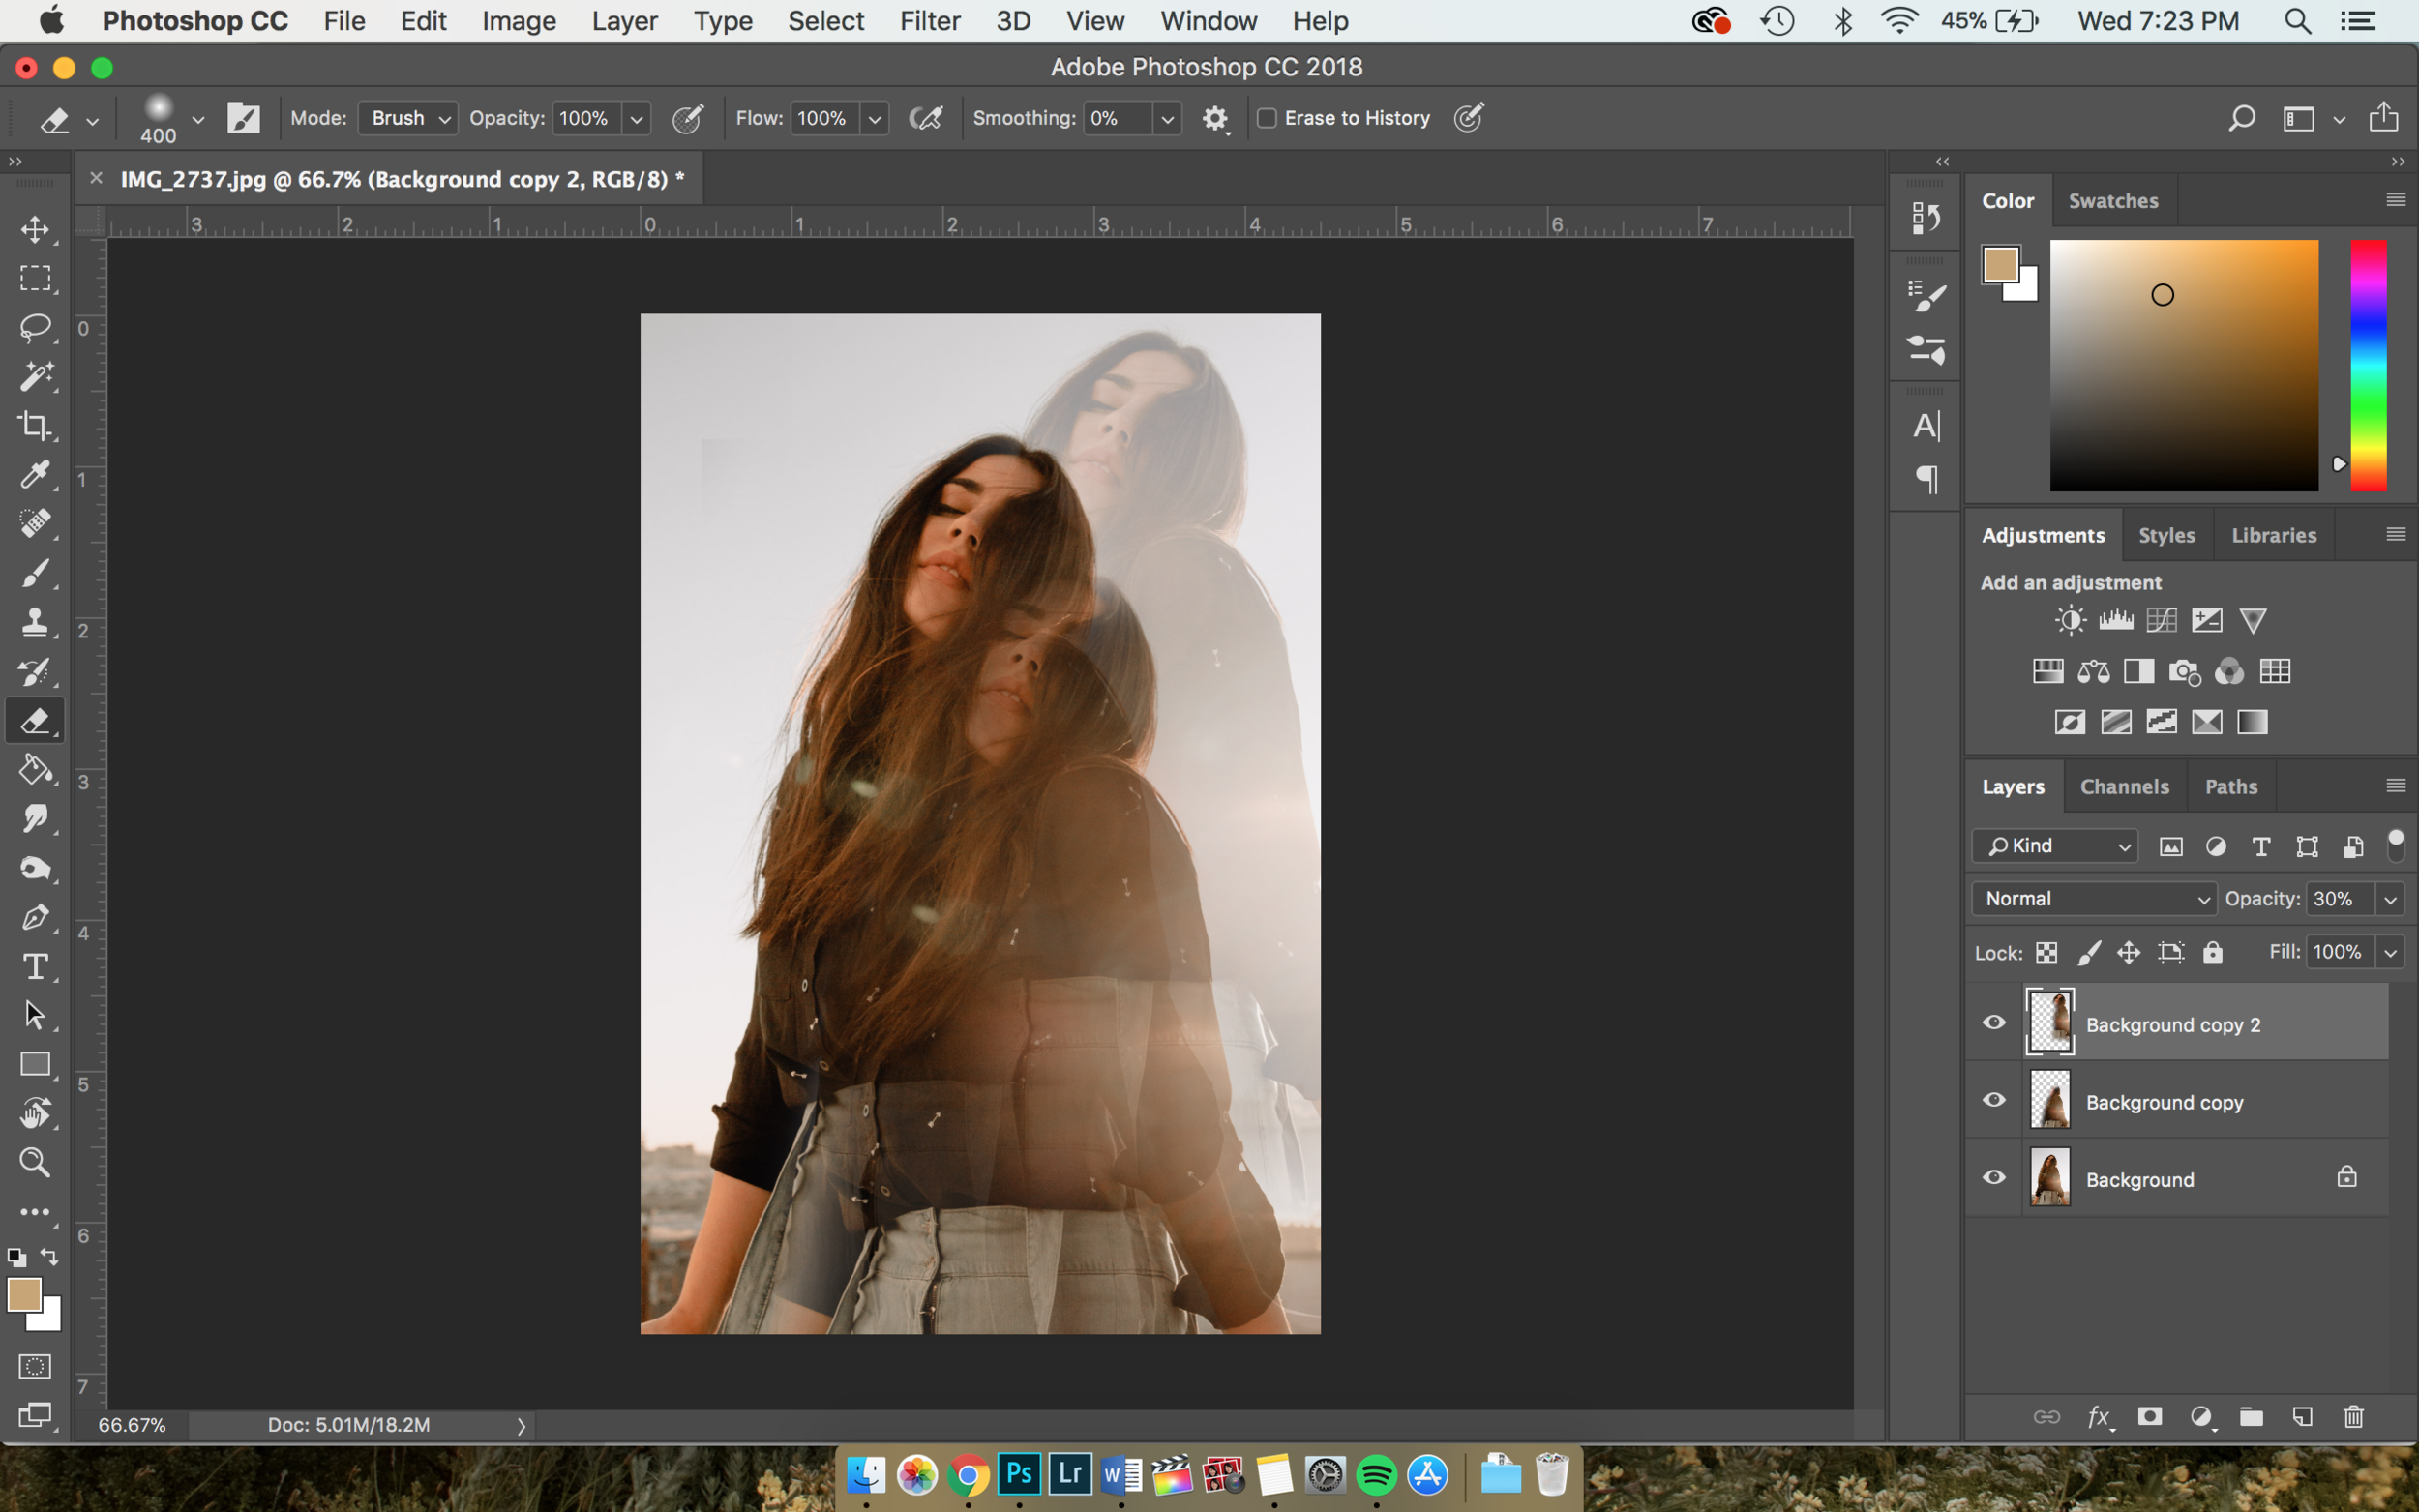
5. Click your original background layer and duplicate it again. (Shortcut: Double-click layer > Duplicate Layer) Then drag that layer to the top of the other layers.

6. Press “V”, drag photo to upper right corner, set opacity to 30% and erase around border of photo.
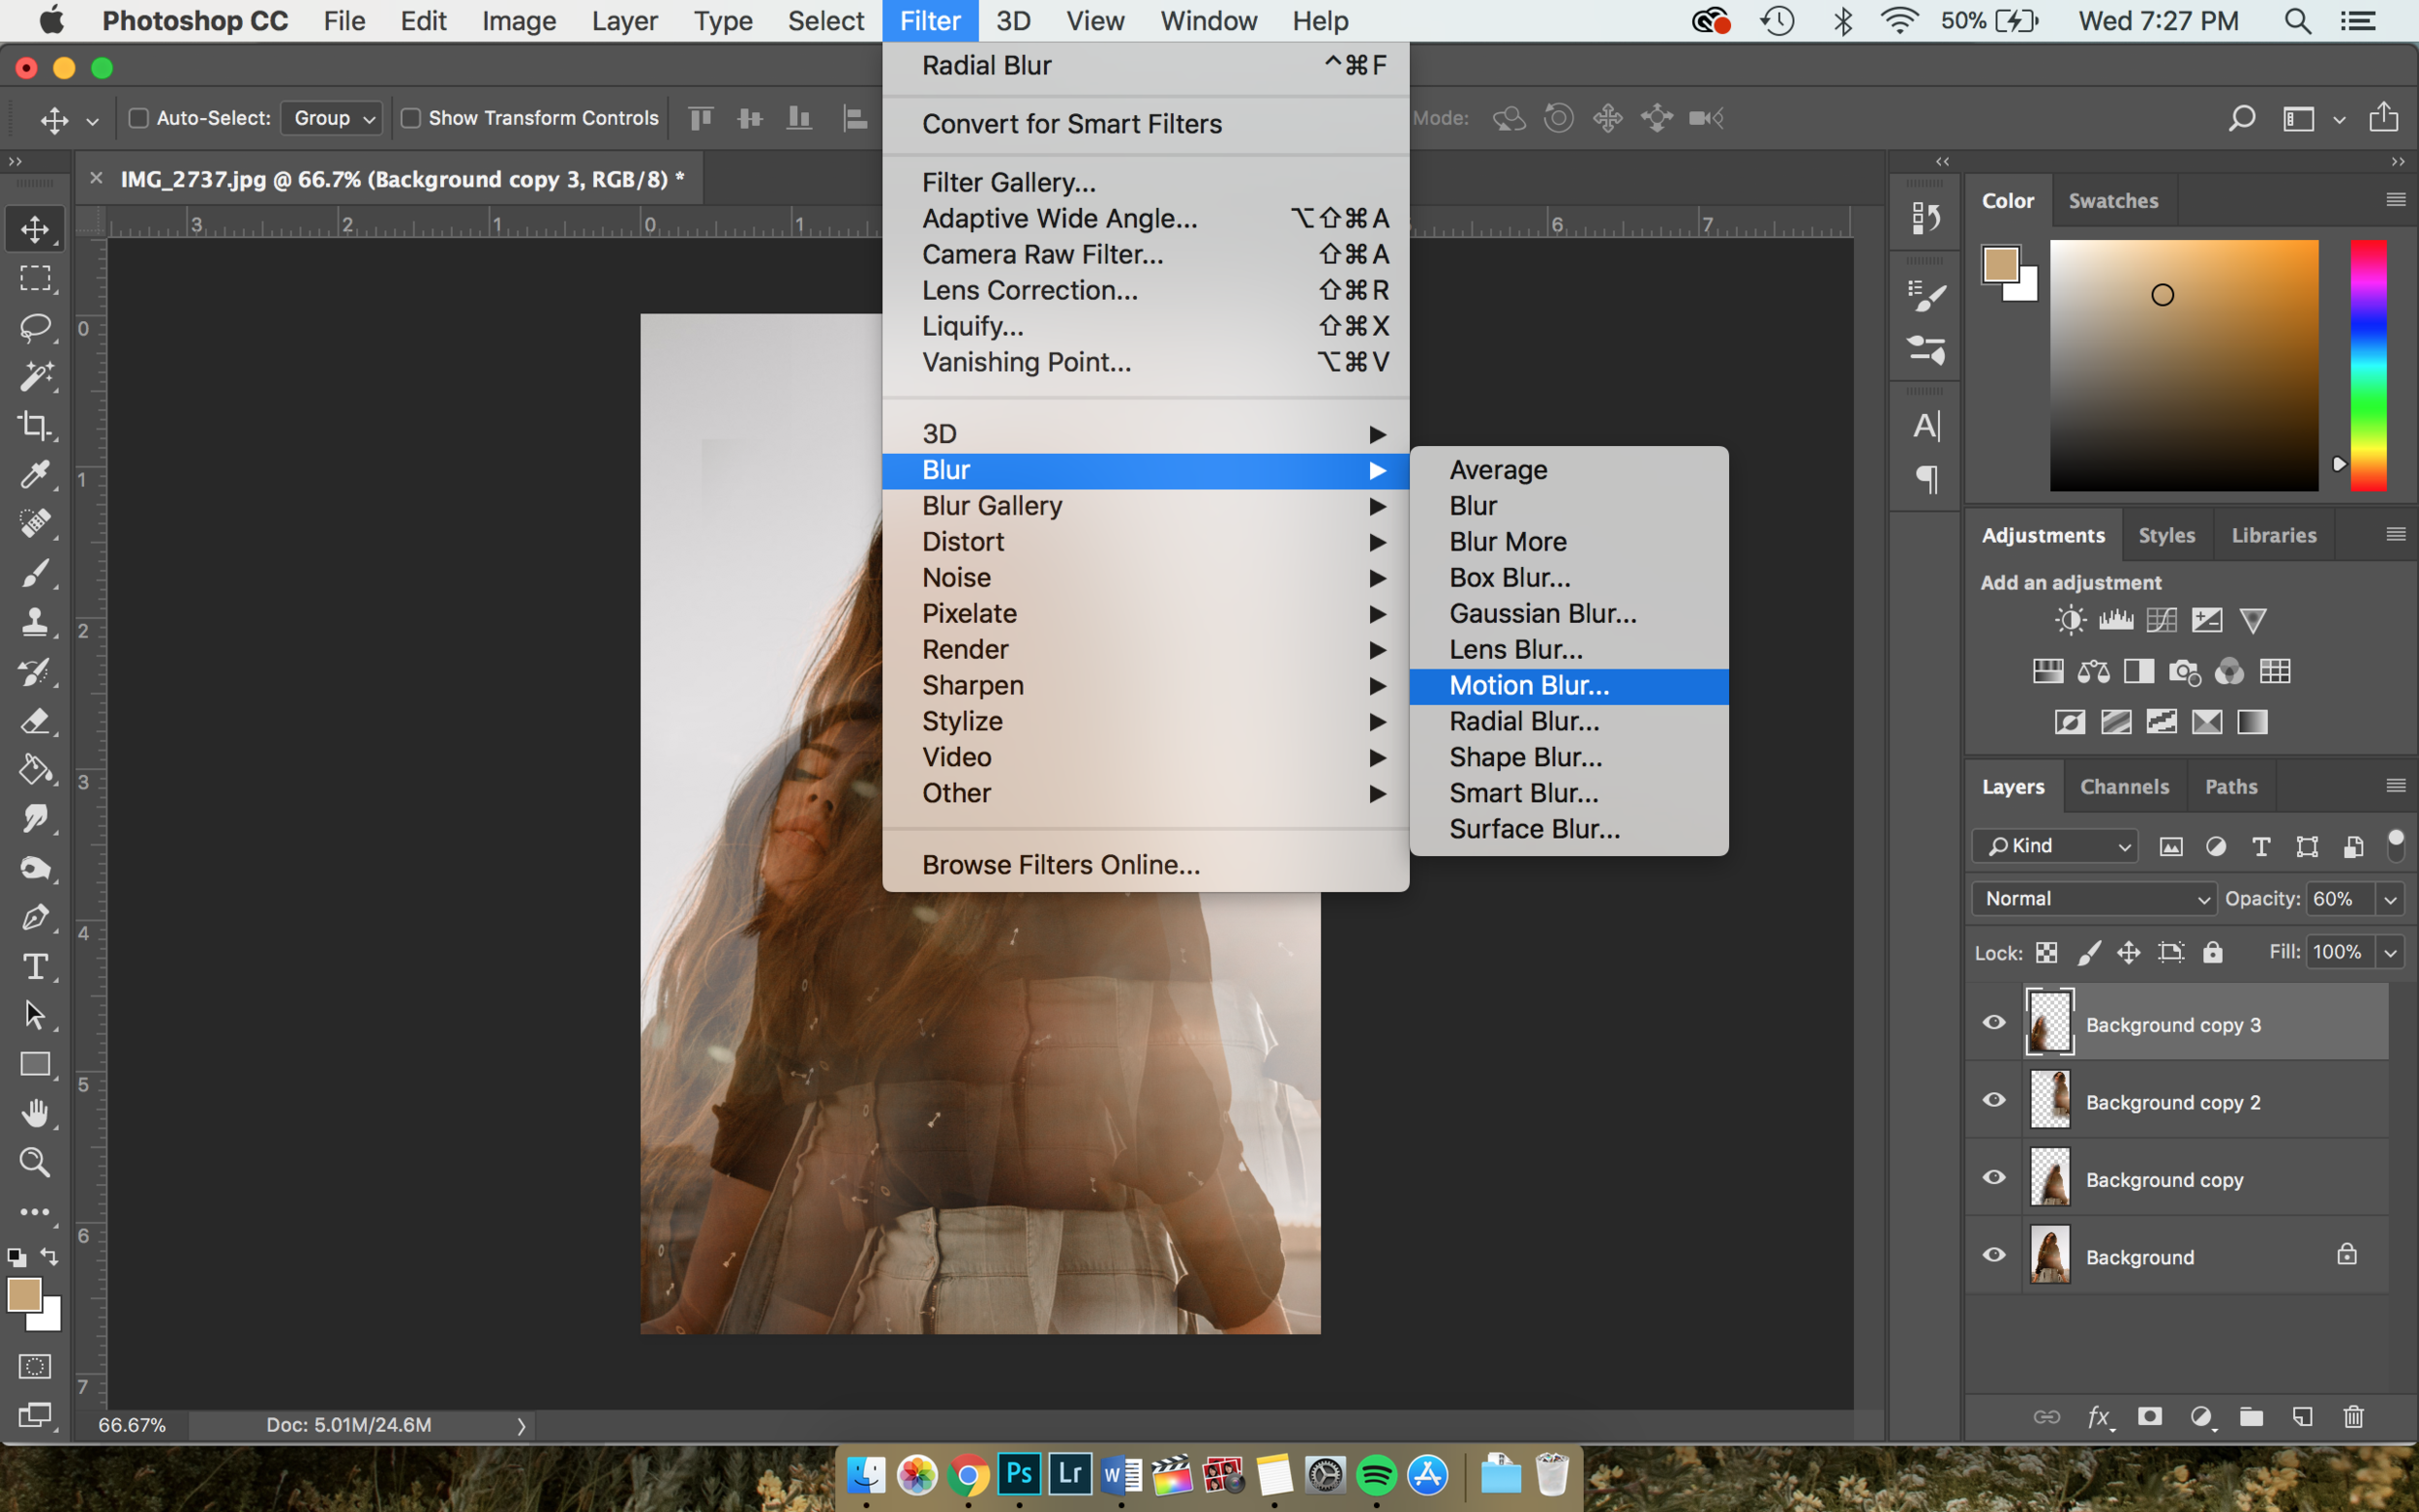
7. Duplicate the original background layer again and drag it to the top.
8. Press “V”, drag photo to lower left corner, set opacity to 60% and erase around border and into the right side of the body.

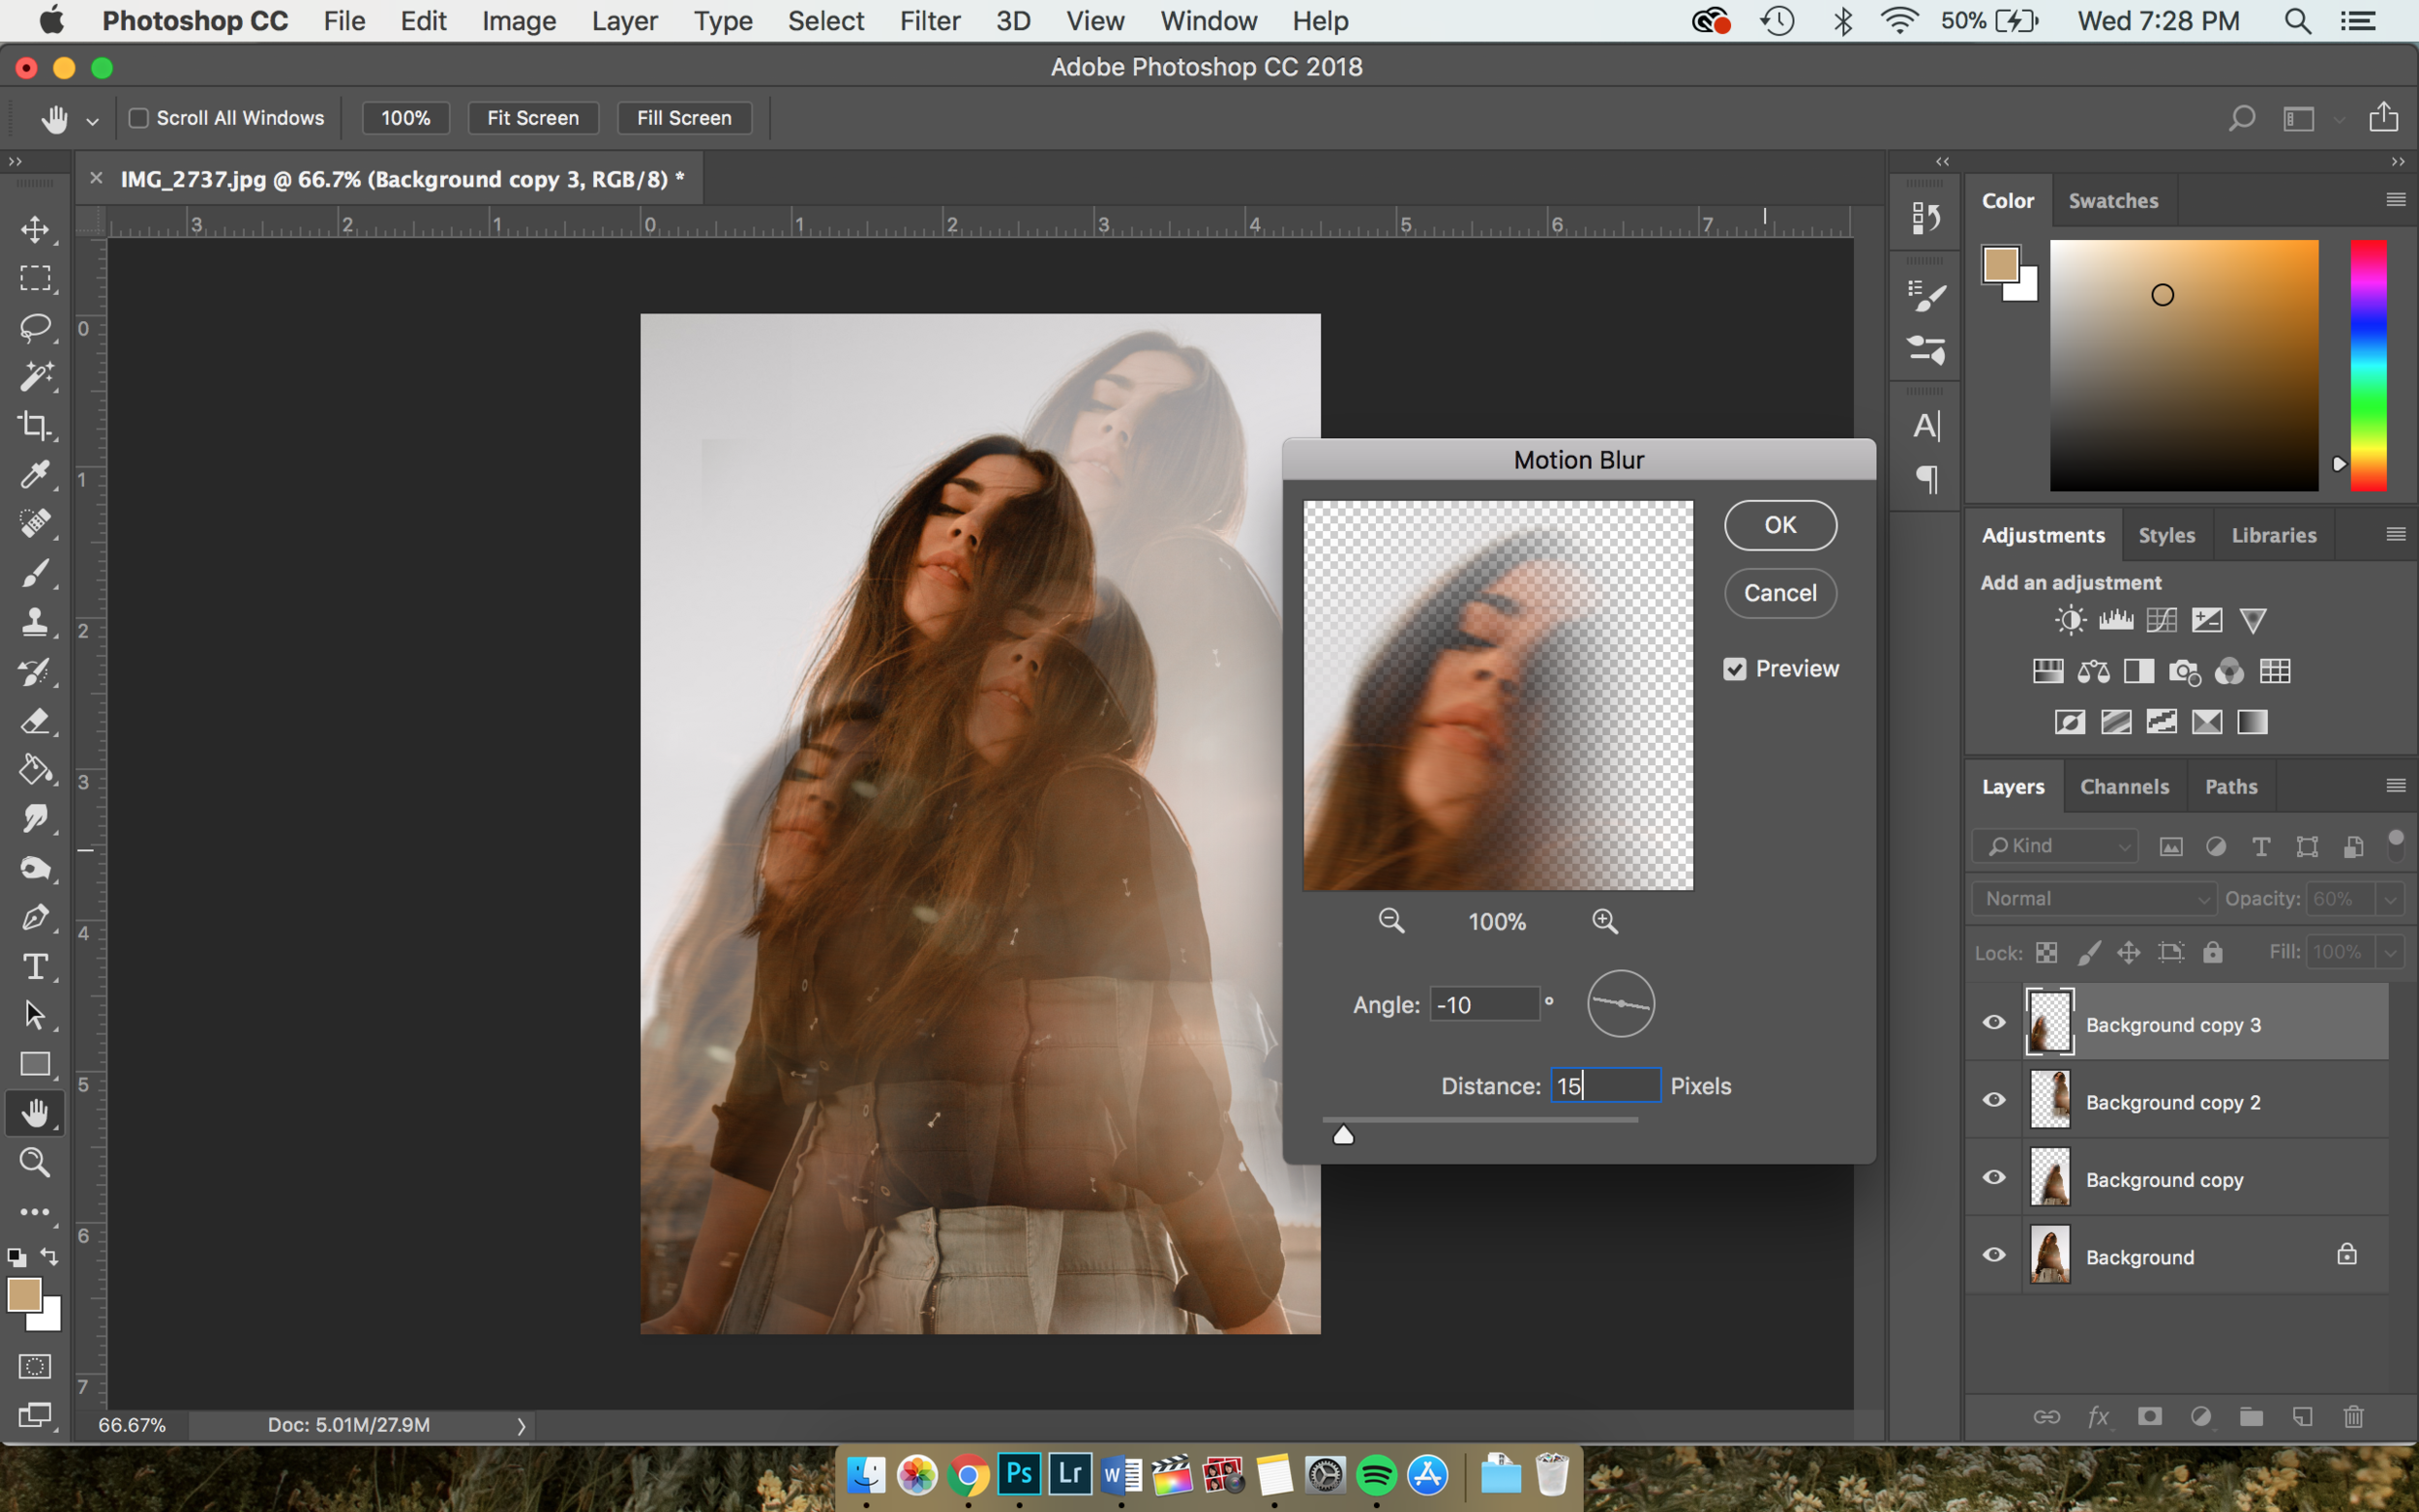
9. Go to Filter > Blur > Motion Blur and set angle to -10 and distance to 15.
10. Duplicate original background layer and drag to top. Press “V” and drag photo to upper left corner. Set opacity to 40% and erase around the border.
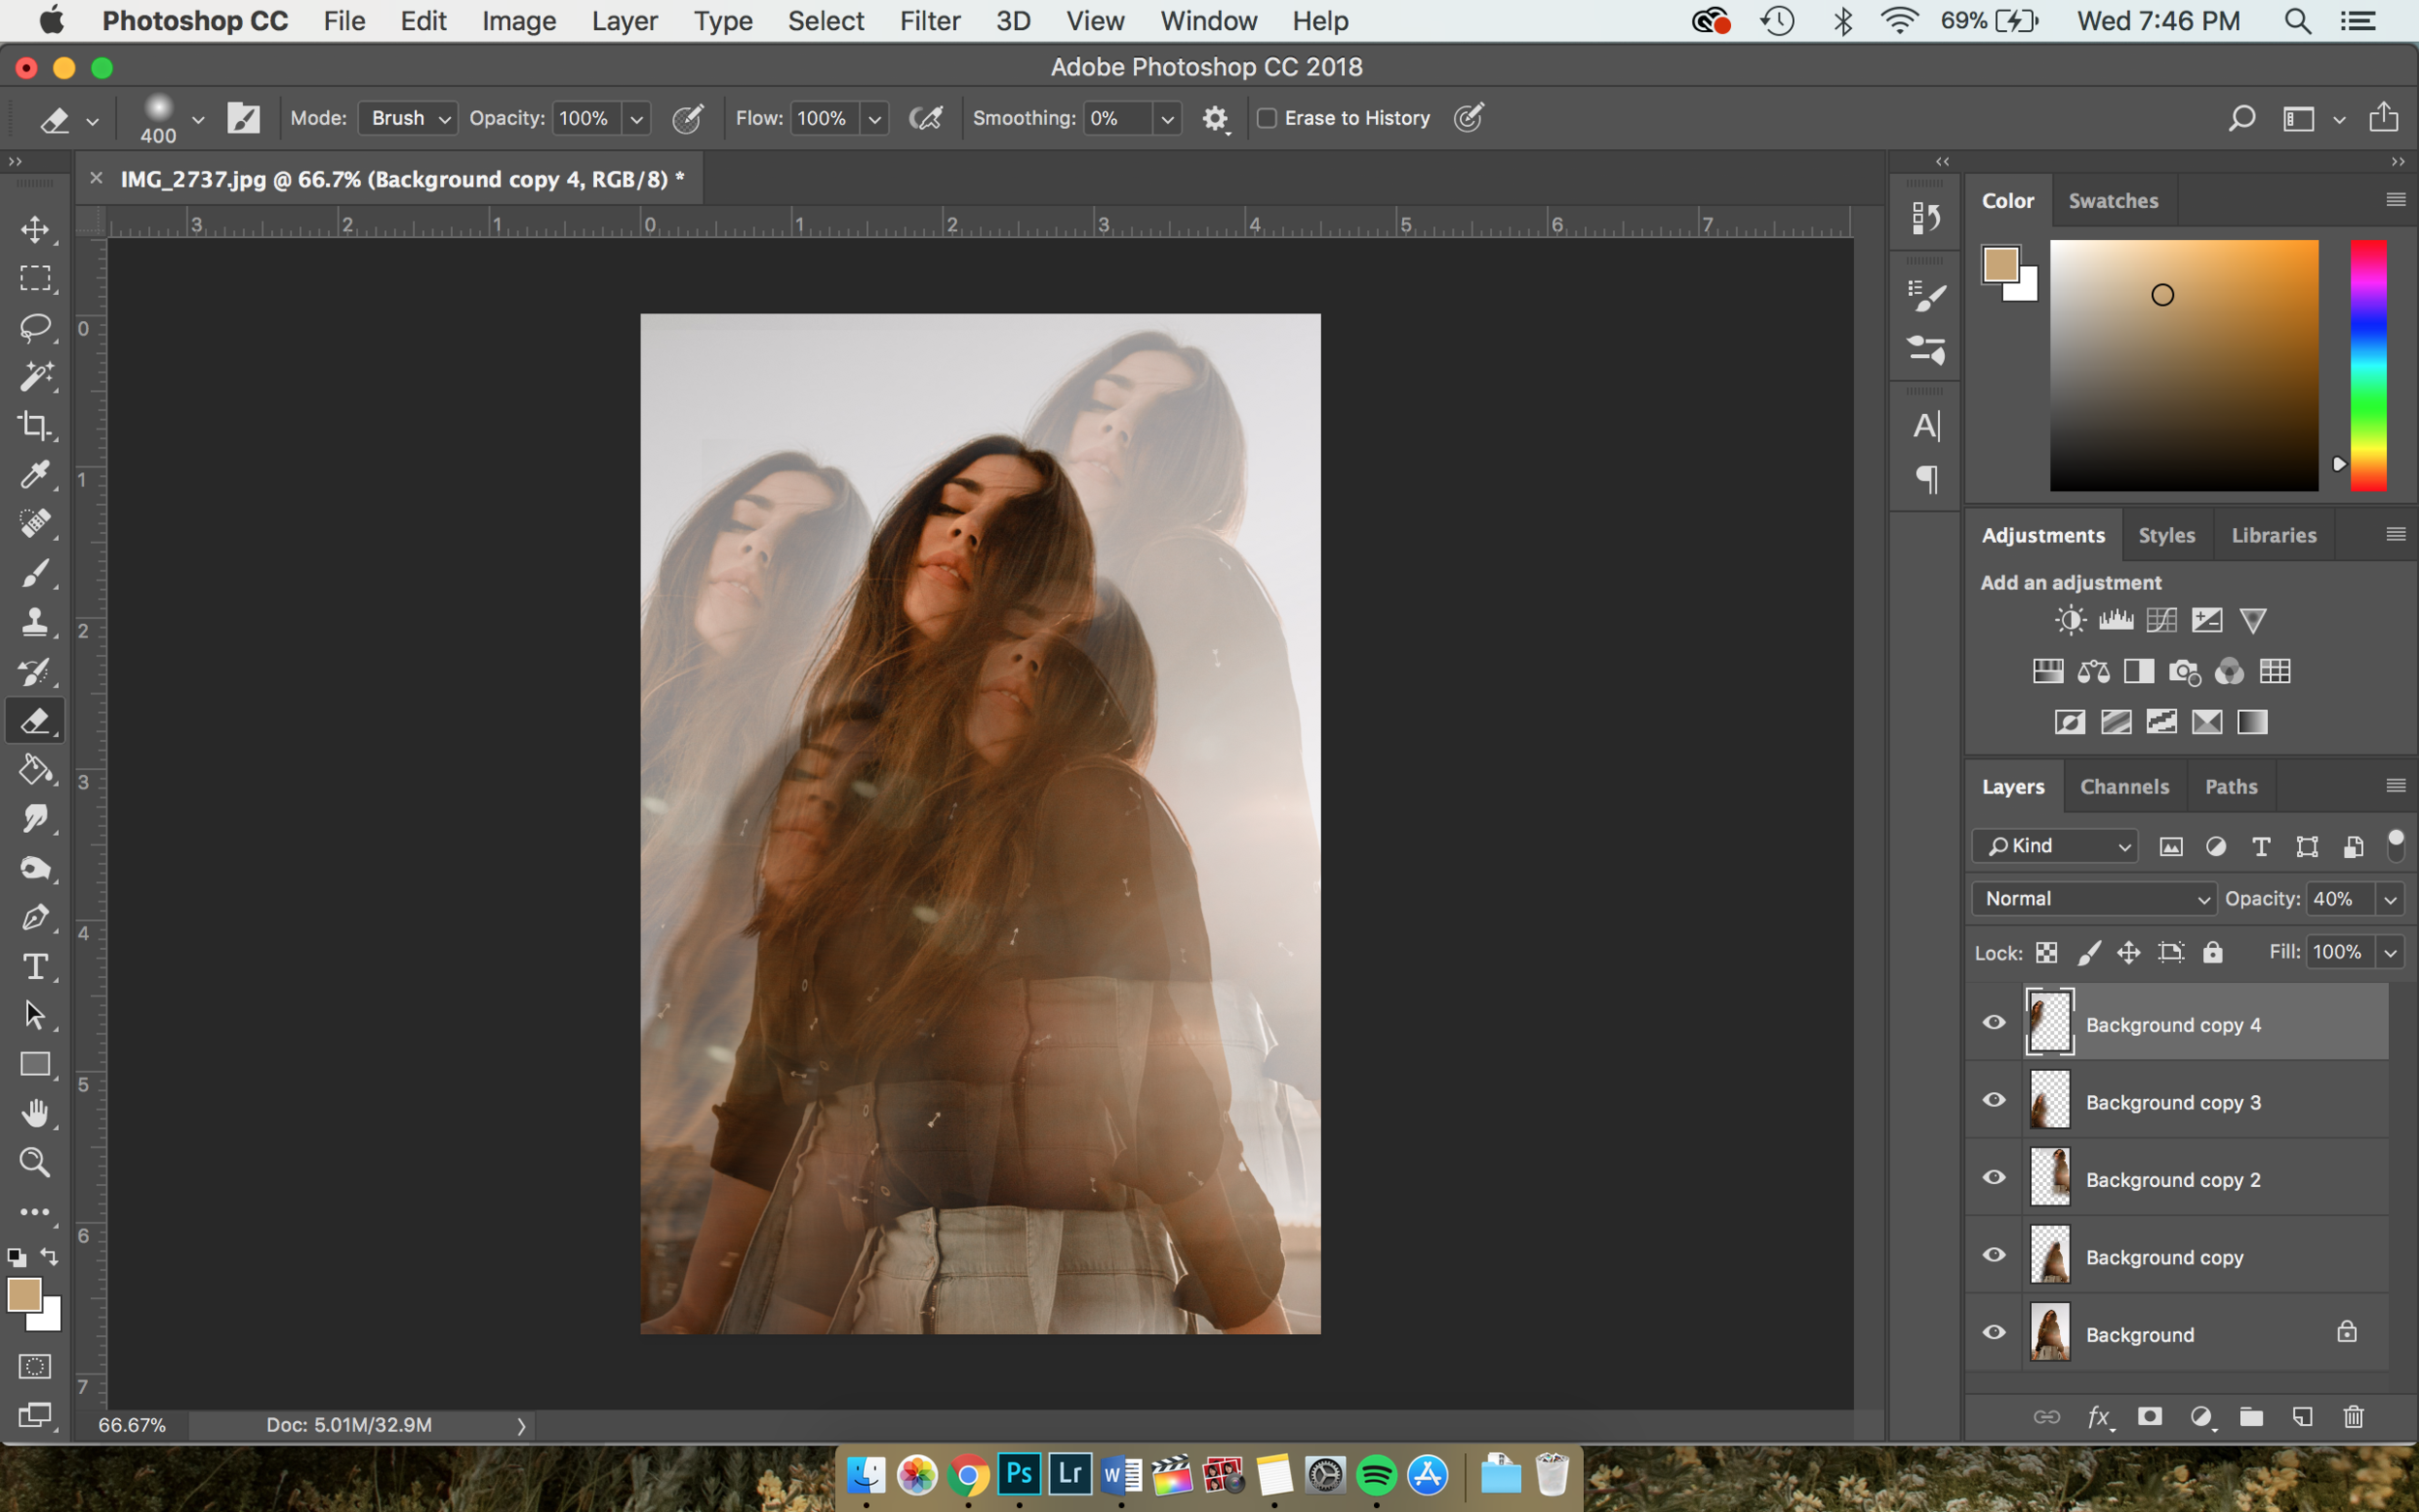
11. Press Command + Shift + E to flatten all your layers
12. Press Command + A to select the entire image, then Command + T. Hold down Shift + Alt (Option) while dragging lower right corner outward. We are making the photo look better compositionally within the frame in this step!
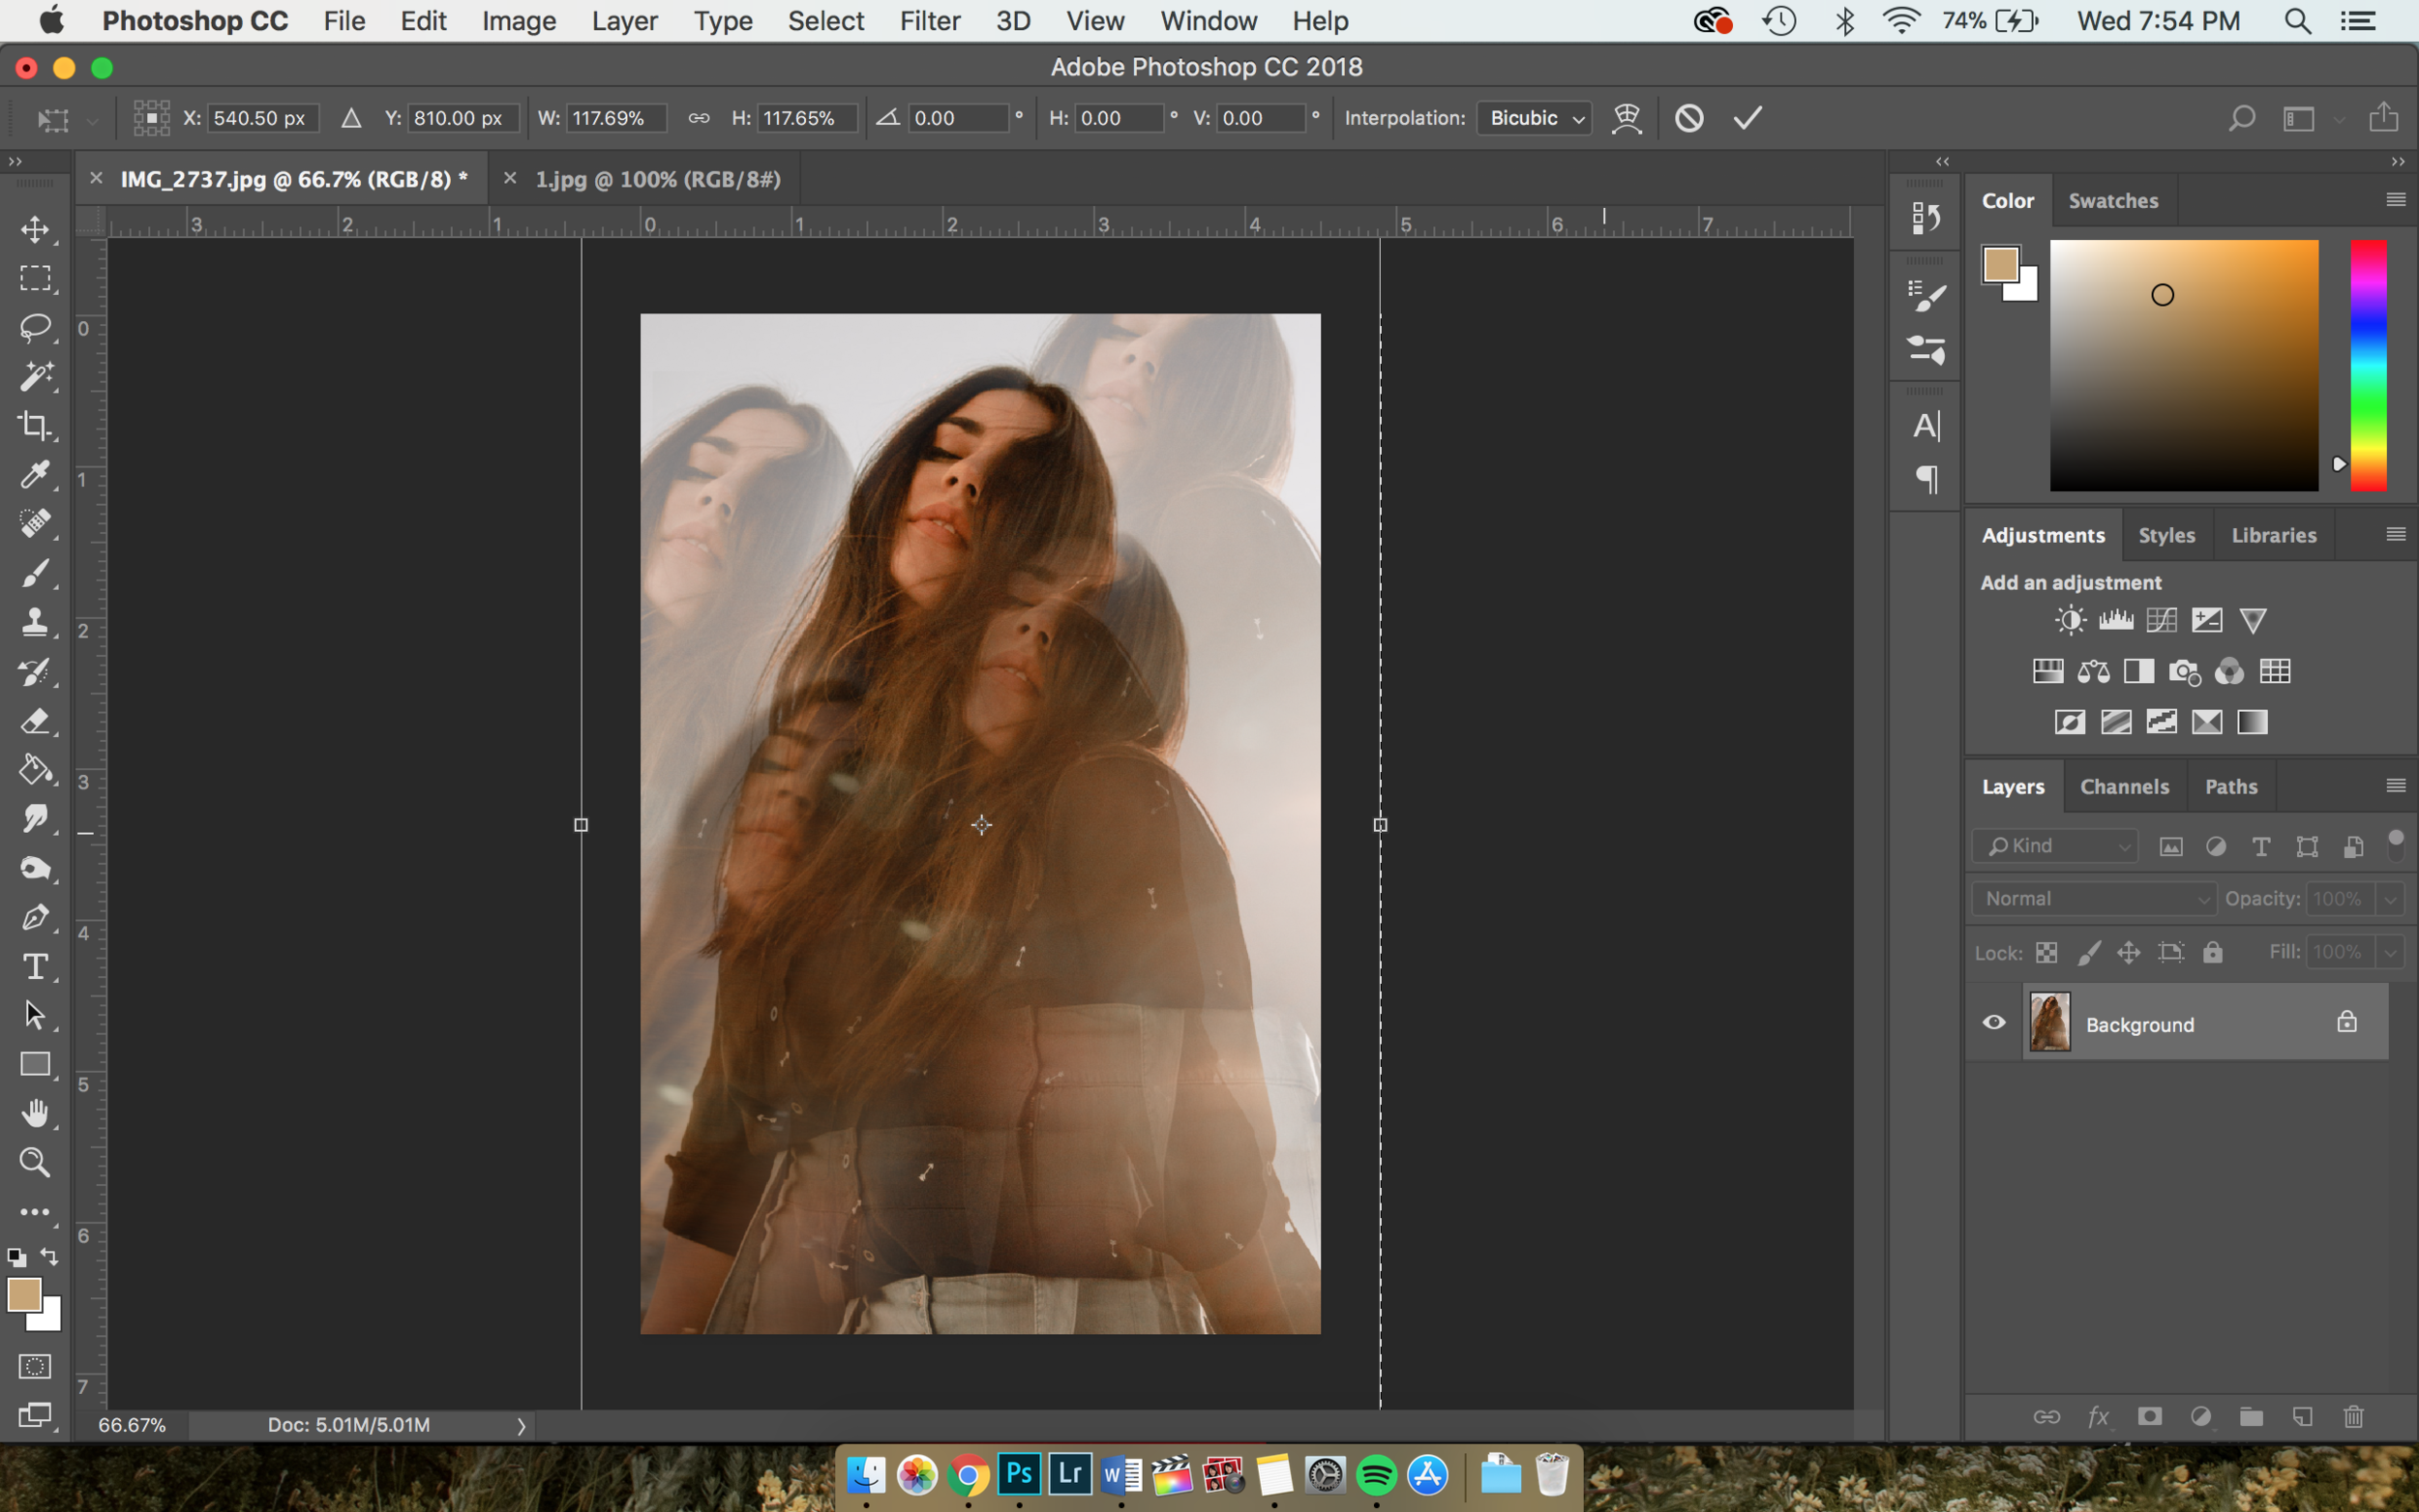
13. Click the Enter key & then save your masterpiece! Well done!!! Wasn't that hard, was it?
The Final Result:

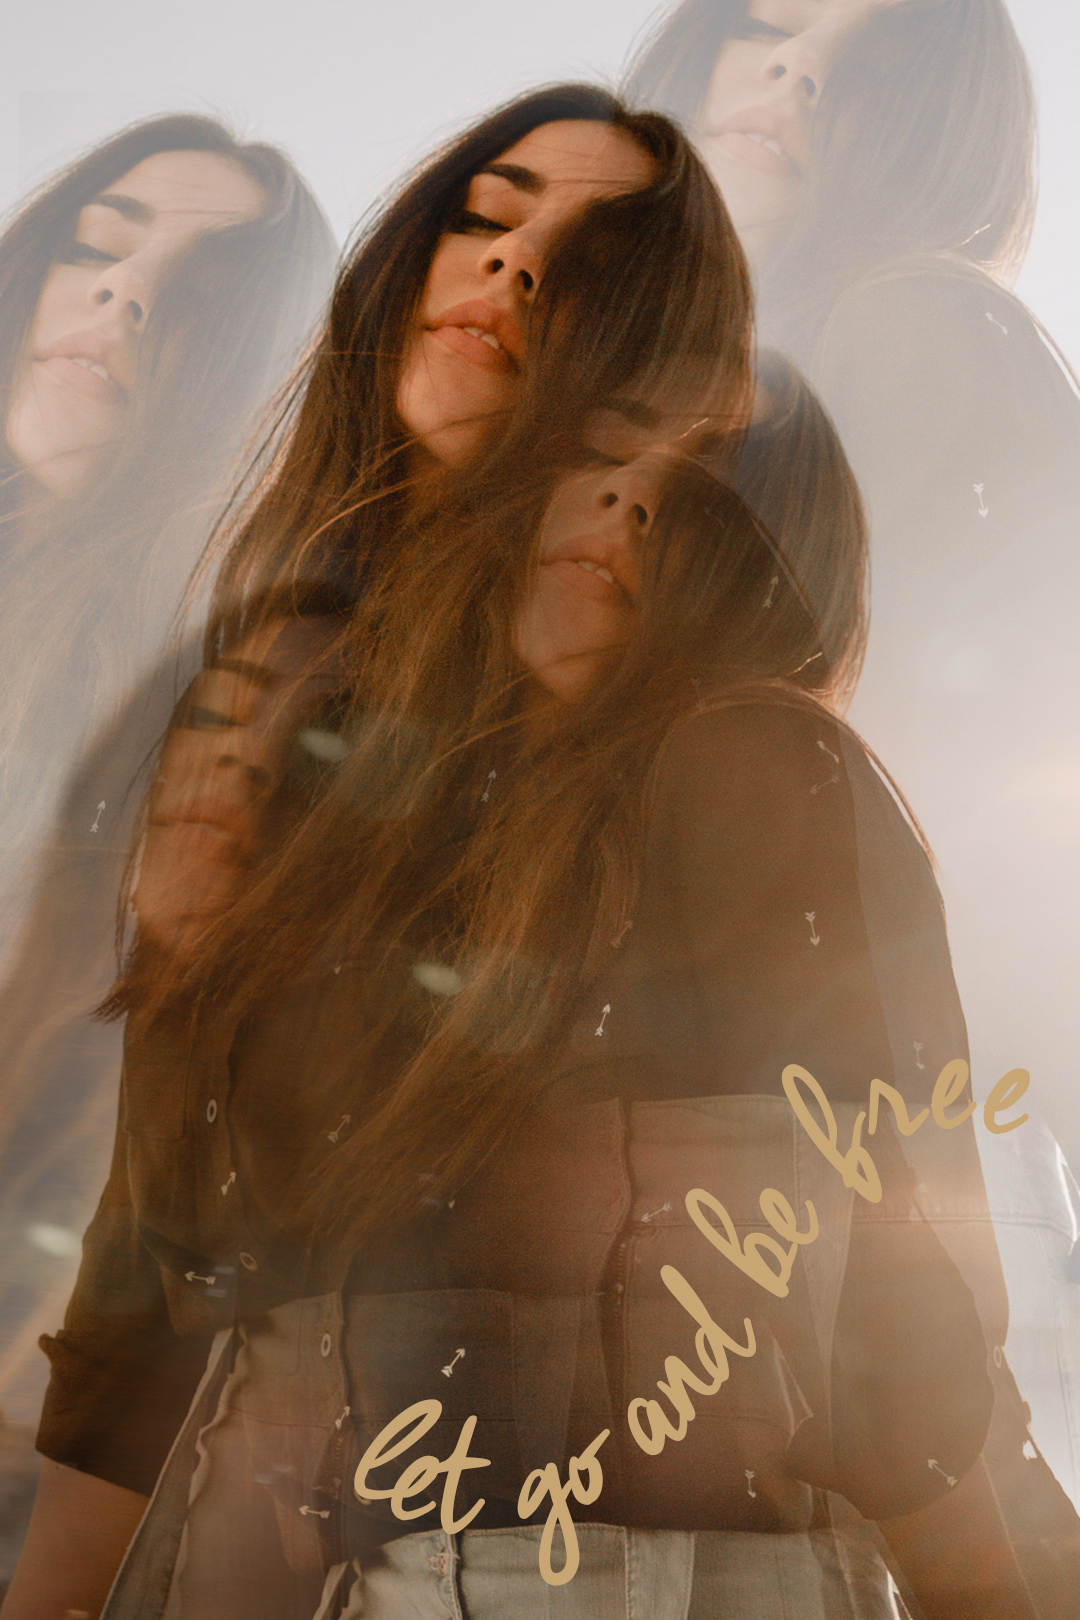
Style It!
Once you've finished the tutorial, try making it totally your own! Experiment with fun light leaks, text, or scratches and dust for a film look. Try doing different percentages of opacity or messing around more with motion blur. Go wild and see what you come up with! Here are some examples of what I did.

I hope you enjoyed this kaleidoscope photoshop tutorial! Show me what you come up with by tagging @haleyivers in your Instagram photos, comments, Insta story or DM me! I'd love to see your creations :)